Explore flows
Every flow has a diagram. Open it from Architecture > Flow Diagram in the flow's sidebar, or go to /visualiser/flows/{flow-id}/{version}. The same diagram renders on the flow's docs page.
From the diagram you can group the steps by who owns them, walk through the flow one step at a time, and open the resources the flow uses.
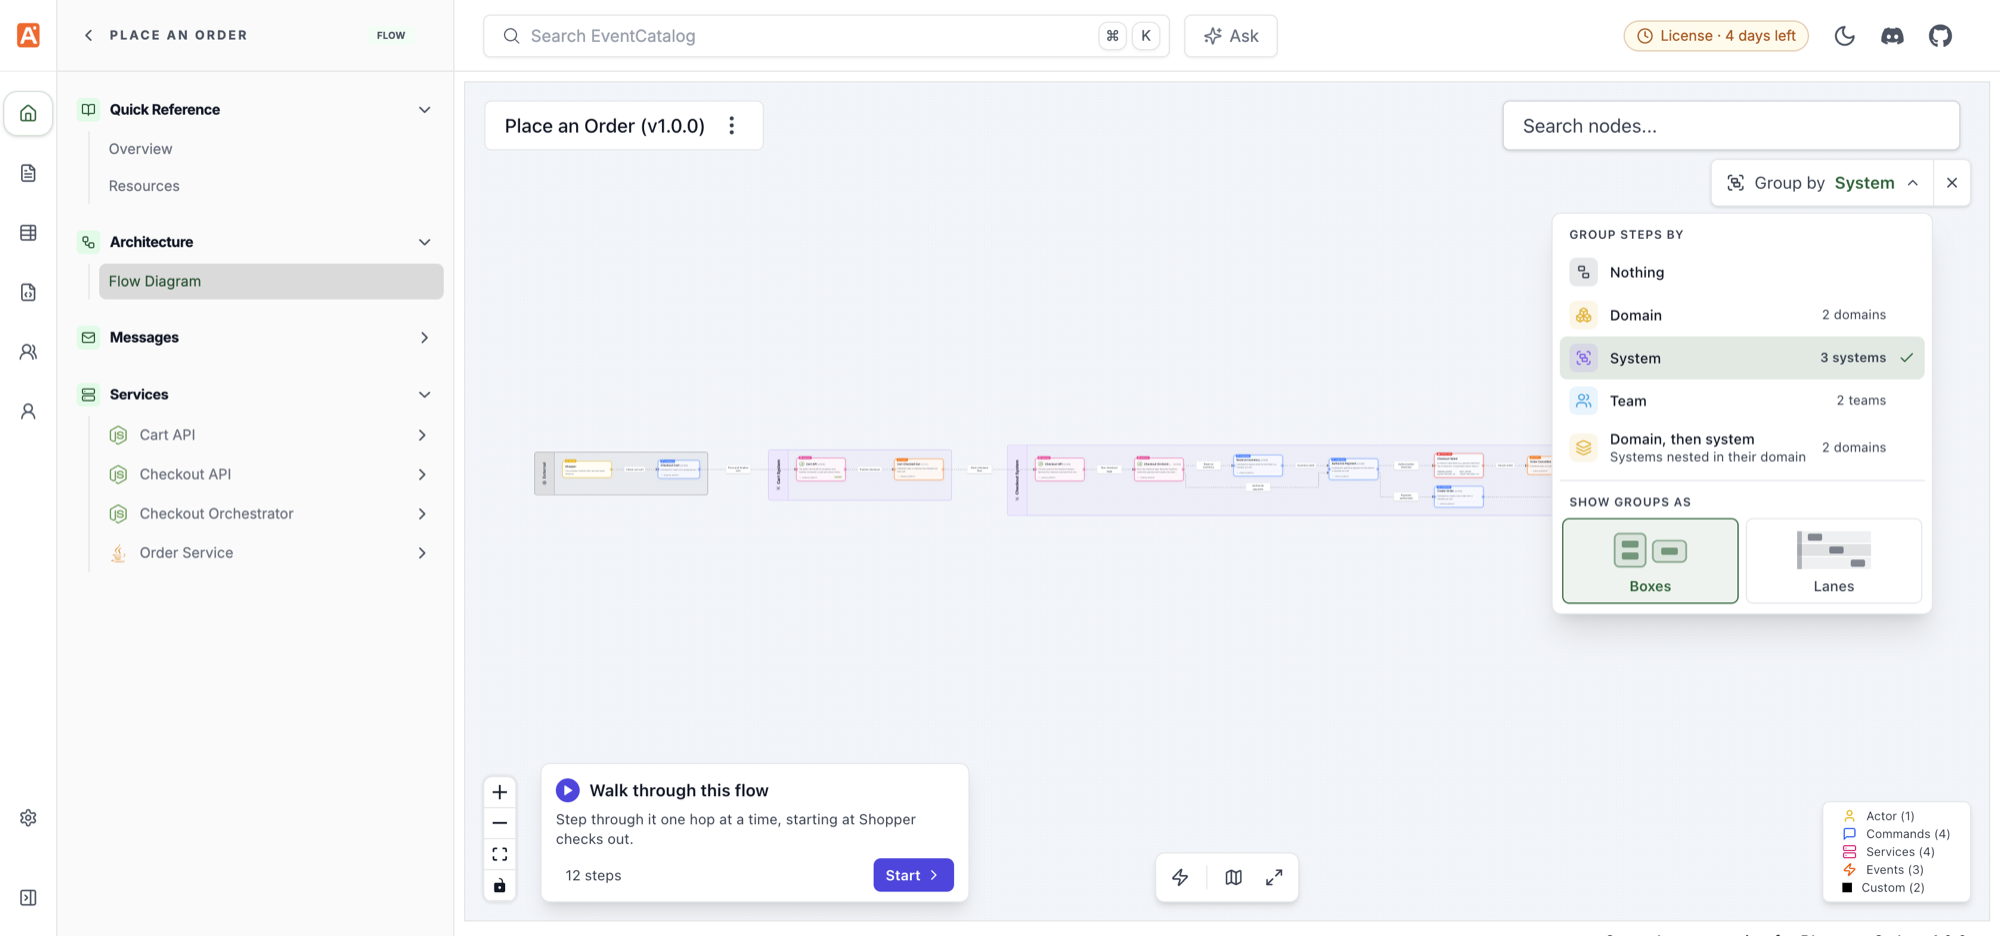
Other diagrams have L1, L2 and L3 levels in the canvas toolbar. Flow diagrams don't have levels. Use Group by to see where the steps sit in your architecture.
Group steps by domain, system or team
eventcatalog@5.0.0Use Group by in the top right of the diagram, or press G, to group the flow's steps:
| Option | What it does |
|---|---|
| Nothing | No groups (the default). |
| Domain | One group per domain. |
| System | One group per system. |
| Team | One group per owning team. |
| Domain, then system | Systems nested inside their domain. |
Each option shows how many groups it makes (for example "3 systems"). The menu only lists options the flow has groups for.
Under Show groups as, choose how the groups are drawn:
- Boxes: a box around each group's steps. This is the default.
- Lanes: full-width lanes stacked top to bottom, with the group's name down the left-hand side.
Lanes don't nest, so Domain, then system always uses boxes. If you pick Lanes with it, the flow is grouped by domain only.
To stop grouping, click the × next to Group by, or choose Nothing.
Where the groups come from
You don't need to change your flows to group them. EventCatalog works out each step's group from your catalog:
| Step | Group |
|---|---|
| Services, agents, data stores and data products | The domain and system they belong to, and their owning team. A resource listed by a domain directly belongs to that domain, otherwise it belongs to the domain of its system. |
| Systems | That system, and the domain that lists it. |
| Messages, channels, custom steps and sub-flows | The group of the step before them. A step at the start of the flow takes the group of the step it leads to. |
| Actors and external systems | A group of their own, named External. |
The team group comes from the resource's owners. When a resource has several owners, a team wins over a user. Hidden teams and users are left out.
Steps that don't belong to any group sit outside the boxes. With lanes, they go in a lane named after what's missing, for example No system.
Share a grouped flow
The grouping is kept in the URL, so a link opens the flow grouped the same way:
/visualiser/flows/place-an-order/1.0.0?group=system&groupStyle=boxes
| Parameter | Values |
|---|---|
group | domain, system, team, domain-system |
groupStyle | boxes, lanes |
To embed a flow that starts grouped, use the lanes prop on the <Flow /> component, for example <Flow id="place-an-order" lanes="team" />.
What changes while a flow is grouped
- Save Layout is hidden in dev mode, because grouped steps are placed inside their groups. Stop grouping to save a layout.
- Copy as mermaid and Render as mermaid leave the groups out.
- Sub-flows can't be expanded inline.
Walk through a flow
The walkthrough card in the bottom left of the diagram steps through the flow one hop at a time. It names the step the flow starts at and how many steps the flow has.
- Click Start on the Walk through this flow card. The walkthrough starts at the first step.
- Click Next, or press →, to move to the next step. Click Back, or press ←, to go back.
- At a branch, pick the way on from the dropdown (or press its number, 1 to 9), then click Next.
- At the end of the flow, click Restart to walk through again, or Finish to see the whole flow. Press Esc at any time to stop.
While you walk through:
- The steps you've walked are numbered, and the current step is ringed.
- The card shows the current step's type, title and summary. Click More to read a long summary in full.
- Click the link icon on the card to open the current step's docs.
- If you change the grouping, the walkthrough carries on from the same step.
The walkthrough shows on the flow's diagram page and docs page. On a <Flow /> embed, turn it on with walkthrough={true}.
See the resources a flow uses
eventcatalog@5.0.0Every flow that references catalog resources gets a Resources page. Open it from Quick Reference > Resources in the flow's sidebar, or go to /docs/flows/{flow-id}/{version}/resources.
The page lists the services, messages (events, commands and queries), agents, data stores, data products and sub-flows the flow's steps use, and the decision records (ADRs) that apply to the flow. Use the filters to narrow the list by type, or search by name.
The Resources link only shows in the sidebar when the flow has at least one resource to list.